

What Is Camera Ready Art
Height Press Place Order Now
Payment Methods Free Professional File Checking Services Free Proofs of Your Art Files
Camera-Prepare Artwork
Preparing Print-Set up Art Files for Commercial Press
Mayhap you have plant this web page considering you were told by a printing visitor that your fine art files are "not camera set up" ?
A professional person graphic designer can assist your printing wait more polished and professional, but if you are on a tight budget that may not be an option. Rather than hire a designer, many small-scale businesses opt to create their own marketing materials to save coin. Without professional person software (and the proper training) that tin can be a challenging task. If you follow the steps below advisedly you will be able to supply a printing company with the digital art file(south) they need to print your lodge.
What Exactly is Camera Set Art?
The term "artwork" is often confusing to people exterior of the press manufacture. Past art, the printing company is referring to a digital file (ordinarily a PDF) of whatever it is that you want to accept printed. Information technology could be as simple as a logo, or even just one or more than words of text, just information technology is still called "the artwork."
Camera Gear up Fine art is the term used in the printing industry referring to a digital document that is gear up to be printed. For a document to exist Camera Ready ways that the printing company tin utilize the digital art file "as is," and that no file editing on their end is required get-go printing your order.
There are many reasons your art file may not be ready to print. Below is a footstep-by-step tutorial that goes through all of the criteria necessary to make a digital art file Camera Ready. If you have no experience in Graphic Design you may observe it somewhat overwhelming. Feel free to contact Acme Printing if you would rather rent a professional person to create your camera ready art for you.
Nearly all of the steps necessary in creating a photographic camera-ready fine art file occur in the outset, when the document is first created. One time properly setup y'all tin proceed with confidence that your designs will impress as intended.
How to Make Camera Ready Fine art
A Step-By-Pace Tutorial
![]()
Stride Ane – Choose your Software (Advisedly)
Adobe software is the industry standard for professional person graphic design. Packed together as the Adobe Creative Suite, Illustrator, Photoshop and InDesign are the powerful trio that create most of the printed marketing materials worldwide. Although QuarkXPress was the preferred page layout program in times past, Adobe InDesign has nearly replaced it in nigh advert agencies and commercial printing facilities.
Microsoft Publisher and Corel Draw are too used, but non besides supported. Choosing whatever other layout program than these listed may cause issues when attempting to use for professional commercial printing. NEW - the newest version of Microsoft Publisher no longer supports saving documents in CMYK Color Space, a major issue if color accuracy is important to your social club.
When laying out your document, vector fine art is by and large the preferred art format, especially for typography and big documents such as signs and banners. Non to say y'all should not employ photos, of course, only place your raster images into InDesign, Illustrator, Publisher or CorelDraw. This will outcome in smaller file sizes and well-baked black type that is not pixelated.
Notation: Photoshop and other raster art programs can not easily create true ii-color fine art. They are for total-color and grayscale artwork only. The same is true when saving art files from ANY software to TIF, JPG, PNG, BMP or other bitmap formats.
![]() Caution: Consult your printer before starting time the blueprint process. Confirm what software & file formats they accept to be certain they support them. Although these are the standard procedures for preparing photographic camera-gear up artwork in the commercial printing manufacture, some printing companies may have slightly dissimilar setup requirements than demonstrated hither.
Caution: Consult your printer before starting time the blueprint process. Confirm what software & file formats they accept to be certain they support them. Although these are the standard procedures for preparing photographic camera-gear up artwork in the commercial printing manufacture, some printing companies may have slightly dissimilar setup requirements than demonstrated hither.
Footstep Two – Set your Document Size
Create a document the size of the finished product.
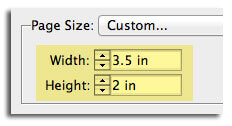 Many novice designers just exit their document size on the default letter dimensions of 8½″ x 11″ which tin cause numerous problems throughout the design and press procedure. Camera set art is set it to the right measurements of the final trim size of the printing.
• If your certificate folds, use the flat (unfolded) size.
• When making a itemize or booklet, employ the single page (folded) size
• For dice cutting designs (special shapes), use the widest length and width before the shape is die cut.
![]() Exception: If you are using a raster fine art design programme, such equally Photoshop, you will need to brand your document size slightly larger than the finished size equal to the bleed zone if y'all want your artwork to print to the edges (typically add 0.25″ to both the hight and width). This is because Photoshop can not have artwork beyond the document edges.
Exception: If you are using a raster fine art design programme, such equally Photoshop, you will need to brand your document size slightly larger than the finished size equal to the bleed zone if y'all want your artwork to print to the edges (typically add 0.25″ to both the hight and width). This is because Photoshop can not have artwork beyond the document edges.
Known equally the pasteboard, Illustrator, InDesign and other layout programs allow you to put your bleed zone on the pasteboard and add together crop marks and bleed when you lot are saving to PDF for the commercial printing company. In Photoshop the drain zone is part of the document itself.
Step 3 – Select CMYK Colour Mode
 Ever blueprint in CMYK colour space when making camera set up art.
All professional pattern programs have at least 2 colour modes: CMYK and RGB, which are completely unlike color spaces.
CMYK color mode is for commercial press; RGB colour is for website development.
Meet Color Essentials for more information.
Step Four – Place your Guides

Conscientious measurements are important to ready your art, so you need to make your rulers visible. They are generally in the VIEW carte, but their exact location varies with your blueprint software and version. In Adobe Illustrator CS6 they are made visible in the top menu by selecting:
VIEW > Rulers > Show Rulers
In one case your rules are visible you can drag-out guides from it, which are low-cal blue lines used to mark measurements (don't worry, they don't actually print). Guides are disquisitional for making the accurate measurements often necessary in photographic camera ready fine art, such as centerlines, folding locations, margins and drain area.
Footstep Five – Reserve Bleed and Margin Infinite

Within and outside of your document edges are ii of import areas in creating a camera ready certificate: the drain zone and page margins (or safe zone). The easiest way to be certain that your bleeds and margins are set up correctly is to drag guides to mark their position.
Bleed Zone
A "bleed" is anything that you want to impress to the very edges of the finished production: a line, photo, illustration, background, etc. that will "run off the edge" of the newspaper. Whatever y'all desire to bleed must exist positioned PAST the document edges where y'all want information technology to bleed.
We recommend that you e'er set your art to follow the printing industries' standard bleed zone of 0.125″ (⅛″) by the certificate edge (on all iv sides). Although press registration is rarely that inaccurate, the drain zone compensates for minor inaccuracies of the printing, trimming and folding equipment to ensure that there are no white cracks (unprinted white paper) on the edges of the finished pieces.
In some cases (depending on your order) Tiptop Printing can accept files with merely 0.0625 bleed, but that is unusual in the industry.

Margin is the space INSIDE of the document edges creating a "safety zone" for art that you do NOT desire to get cut off in the trimming process. Due to modest variations of the production equipment involved, you need a articulate margin of costless space around your fine art. Industry standard is to never place annihilation closer than 0.125″ (⅛″) to the document edge.
In addition to information technology's rubber feature, text and copy too close to the edges of a document do non wait aesthetically pleasing from a graphic blueprint standpoint either. Encounter White Space.

Step Half dozen – Proper Ink Color Option and Usage
Ink Colors - a common reason that artwork is not camera set up involves the improper usage of ink colors. Exist sure that your certificate is set to the CMYK color mode. The ink colors you lot choose now should depend upon what type press your intend to create.
Choose CMYK ink colors for full-color printing. Choose Pantone Solid Colors (too known as spot colors) for one-two color printing. Save your ink colors to the swatches pallet if yous intend to insure y'all keep using the exact same color(s) through your art file.
Unless your monitor is calibrated and of excellent quality, your artwork is likely to have slightly different colors when printed. Professionals use Pantone Color Charts (available in both solid and procedure colors) to ensure accurate color. Encounter printing ink colors for a more detailed explanation of the various types of ink colors & color charts.
![]() If you want total-color printing and your printing company is using modernistic equipment, artwork received using Pantone Solid Colors or RGB (Web) colors may automatically be converted into CMYK colors, but this may also crusade some colors to change significantly from how they appeared on your computer monitor. Supplying artwork with incorrect colors to a printing company that outputs to moving-picture show may consequence in the wrong colors used non printing at all, as they are never imaged onto the press plates at all.
If you want total-color printing and your printing company is using modernistic equipment, artwork received using Pantone Solid Colors or RGB (Web) colors may automatically be converted into CMYK colors, but this may also crusade some colors to change significantly from how they appeared on your computer monitor. Supplying artwork with incorrect colors to a printing company that outputs to moving-picture show may consequence in the wrong colors used non printing at all, as they are never imaged onto the press plates at all.
![]()
Check your Color Separations: if your art is photographic camera ready then all document components (text, images, backgrounds, etc.) should be prepared for the color fashion in which it will be printed: CMYK, Spot-Color or grayscale. A colour-separated PDF is an excellent way to cross-check your work for accurateness.
Notation: If you encounter type in the color separated PDF on all four plates that was meant to print merely as black ink (and not rich black), you made the common fault of selecting the registration swatch (which looks blackness) instead of the real black ink swatch. This tin crusade issues, including a muddy look (not crisp) to fine blazon. Large solids of registration can fifty-fifty crusade the sheets of newspaper to glue themselves to one another, as information technology consists of 100% of all iv of the CMYK inks.
![]()
Step 7 – Use Only High-Resolution Images
Image Resolution - all photos and other raster art should be at least 300 DPI to ensure they print clearly. Low quality images may announced blurry and pixelated. Mod print equipment resolution is 350 DPI or improve.
Most of the total colour products from Superlative Press are 500 DPI (photo-quality).
![]() DO NOT scan previously printed images (known equally re-screens). Scanned rescreens, when printed, will incorporate a foreign looking pattern called a moire unless you blur the halftone browse to remove the dot pattern. A proof will not reveal a moire problem, equally virtually digital proofs are printed with a continuous tone, not halftones. The moire will not get apparent until your project is already plated and on the printing press.
DO NOT scan previously printed images (known equally re-screens). Scanned rescreens, when printed, will incorporate a foreign looking pattern called a moire unless you blur the halftone browse to remove the dot pattern. A proof will not reveal a moire problem, equally virtually digital proofs are printed with a continuous tone, not halftones. The moire will not get apparent until your project is already plated and on the printing press.
![]() Annotation: images "borrowed" from a website are typically only 72 DPI. Although they "look fine on screen," they are not advisable for commercial quality printing unless scaled down to 25% of their original size (usually also modest to be suitable for your needs). An exception to this guideline is signage or whatever other graphic that is usually not viewed close up anyhow, where 72 dpi may look adequate (as long as you don't enlarge the image). There are many stock photography websites that have big images at an inexpensive price. At that place is also a manner in a Google Search to constrain your images search to only large images click on "Search Tools" and see "SIZE".
Annotation: images "borrowed" from a website are typically only 72 DPI. Although they "look fine on screen," they are not advisable for commercial quality printing unless scaled down to 25% of their original size (usually also modest to be suitable for your needs). An exception to this guideline is signage or whatever other graphic that is usually not viewed close up anyhow, where 72 dpi may look adequate (as long as you don't enlarge the image). There are many stock photography websites that have big images at an inexpensive price. At that place is also a manner in a Google Search to constrain your images search to only large images click on "Search Tools" and see "SIZE".

Footstep Eight – Raster Furnishings & Drop Shadows
Many design programs have the ability to apply drop shadows and other special effects to photos, blazon and illustrations. The quality of these effects, however, is often controlled by default settings within your software that are unremarkably preset to a very depression resolution output.
For example, in Adobe Illustrator the dialog box is chosen "certificate raster effect settings," and the default resolution is only 72 DPI. Unless the value is inverse whatever shadowing or other effects will result in a grainy and undesirable result. Set you Document Rater Effects to 300-350dpi for optimum quality driblet shadow and other effects. In CS6 Illustrator the setting is located in the acme menu bar:
Furnishings > DOCUMENT RASTER EFFECT SETTINGS
Step Nine – Avoiding Font Issues

At that place are literally thousands of type fonts bachelor, and no printing company has them all. Even when graphic designers utilise very common typefaces, exist aware there are oft several font foundries that make the exact same font. Substituting fonts with the aforementioned name, but created by different font foundries, tin can sometimes cause issues. A printing facility may substitute their version of Helvetica Italic, for case, for another version of Helvetica Italic. These font substitutions are usually insignificant, but occasionally tracking (font spacing) tin modify enough to throw the catastrophe of a sentence into an photo or analogy.
There are iii solutions to avoiding a font substitution scenario with your press projection:
- Outline your Fonts - Adobe Illustrator, InDesign & CorelDraw, have a method of turning the type fonts into objects, and then they are no longer a blazon font. Obviously you will need to make a re-create of the digital file first, as the typesetting will no longer be editable. This method volition eliminate any possibility of a font problem without losing any quality, such as rasterizing the art.
- Supply your Fonts - many design programs tin automatically collect all of the fonts used in the document. Package them in a folder to supply to your printing facility.
- Make a PDF - in that location are many advantages of making a PDF of your finished artwork. One of these advantages is that all of the fonts are embedded into the PDF file, so anyone that you send it to is guaranteed to see the blazon font exactly equally you intended for them to look.
Step X – Terminal Considerations
Before Sending your Artwork to a Commercial Printer
If all of the above steps were followed carefully your artwork should be camera fix. Prior to sending your art files to exist printed there are just a few things to consider to make sure that your design prints every bit intended.
- Spell Check – professional design programs have a built-in spell check adequacy, just they are not infallible. In addition to spelling consider grammar and punctuation, and certainly your telephone numbers, address and other information that the spell cheque program is unable to aid with. It is always a good idea to accept one or more additional people examine your document for errors yous may have overlooked.
- Re-inspections – make sure all images and special effects are high resolution. Ostend that bleed and margin areas are ample. Verify that your colour space is set to CMYK, and your ink color separations are accurate (example: a ii-color task doesn't have more than the two plates). Notation the position of any bindery functions (such every bit folding or hole-punching) and how they will collaborate with the placement of your designs.
- Finishing Up - in add-on to your document, the commercial printer also needs all of the fonts that were used to create your art.* Unless all of your graphics are embedded, they volition also need whatever linked images too. Many pattern programs (including Adobe InDesign, QuarkXpress & Microsoft Publisher) brand this an like shooting fish in a barrel process. They tin automatically collect all of the fonts and images that yous used in the document and packet them in a folder to supply to your printing facility. Adobe InDesign calls this process "package," in Quark, "collect for output," and in Publisher "pack and go."
* Unless you are providing a press-quality PDF, or you outline your fonts
Transferring your Files– Going to Press
In preparation to transfer your files to be printed, y'all tin can package your files as described above if your software offers the choice. If your document was created in Adobe Illustrator, y'all can brand a re-create and outline the fonts rather than manually gather them. In Photoshop, saving equally a TIF file is recommended, every bit a JPG (although a smaller file size) will somewhat degrade the quality of your images.
Now that you are ready to print your certificate, how are you getting it to your printing visitor?
• If the file size is modest plenty (around 10 MB or less), you can simply email them your art
• Compressing your art files with WinZip or other software can drastically reduce file sizes for emailing
• You can upload your art to DropBox, or a similar system for sharing large files
• Burning to CD (or DVD) and mailing them is always an option (if yous have the time)
• Or save yourself a lot of hassle – brand a proper PDF file and simply e-mail it!
A properly made PDF file volition embed all of the document fonts and images. It will besides compress your file-size to a mere fraction of the original size of the native art without loss of quality. Information technology is not uncommon for an 80 MB brochure to dribble downwards to a 7 MB file, now able to just send by electronic mail.
![]()
How to Make a PDF for Commercial Printing
FYI — the term photographic camera prepare artwork, although nonetheless used, is a rather inaccurate term. Modern press companies no longer use a camera to shoot film nor apply negatives to make printing plates. Printing plates are output digitally without the use of film negatives (chosen direct-to-plate), or the artwork is imaged direct onto the blanket of the press. A more accurate term is condign common: Print-Gear up Artwork.
Source: https://www.summitprintingpro.com/resources/camera-ready-art.html
Posted by: petreecoulth56.blogspot.com
0 Response to "What Is Camera Ready Art"
Post a Comment